

Configuring and starting event recording
The event recording function allows you to set a threshold, record data that exceeds the threshold using an instrument, and then import and view that data.
Thresholds and the number of events that can be saved vary by instrument model. For more information, see “Models that support event recording and associated precautions” below.
1
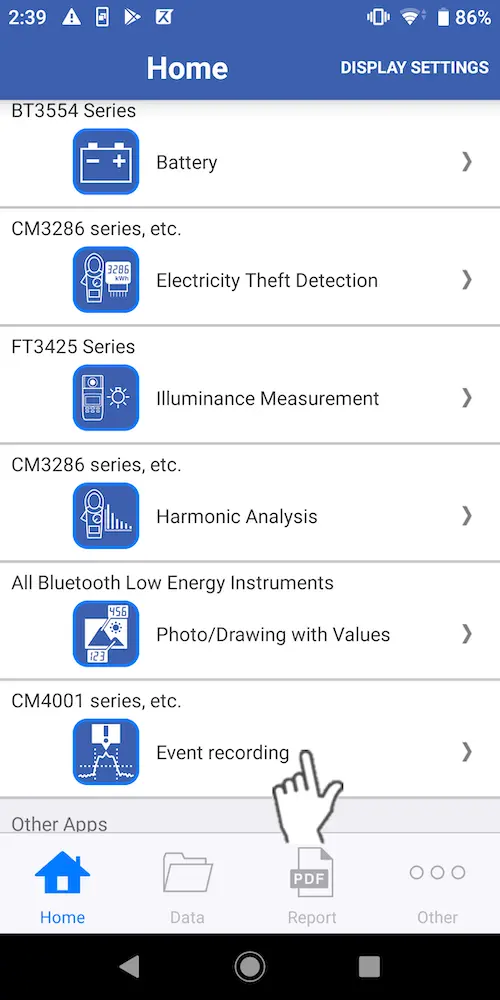
Tap [Event Recording] on the home screen.
If no instrument that supports event recording has been paired with the app, first add a compatible instrument.
2
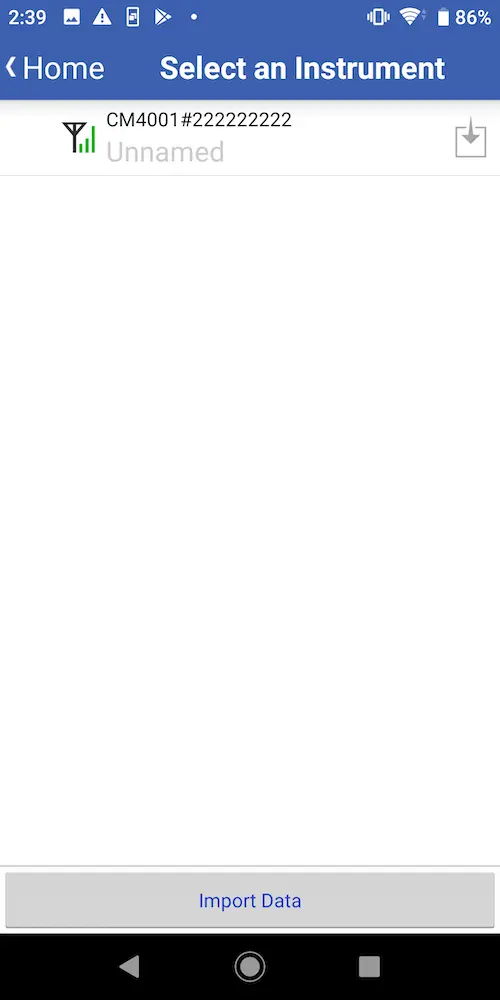
The instrument will be connected to the app in about 5 to 30 seconds on the instrument selection screen.
3
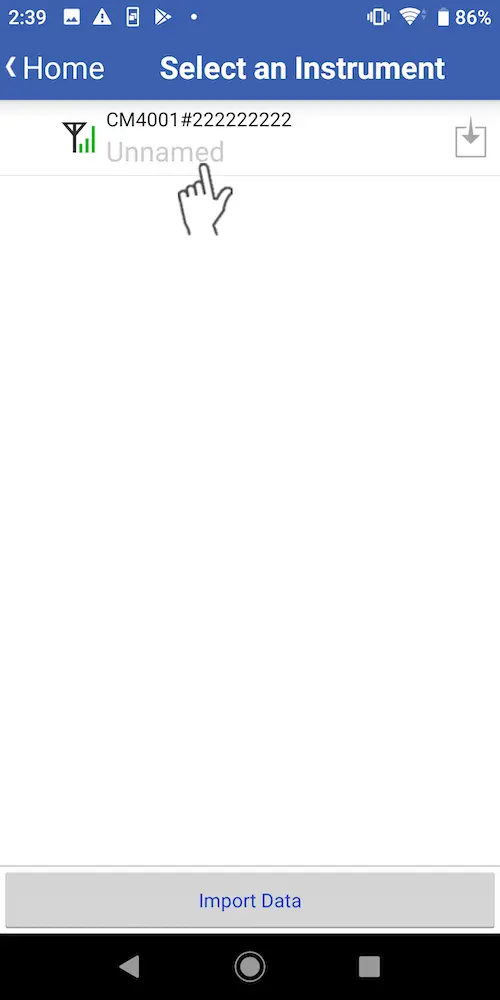
Configure recording settings and select the instrument for which you wish to start event recording.
4
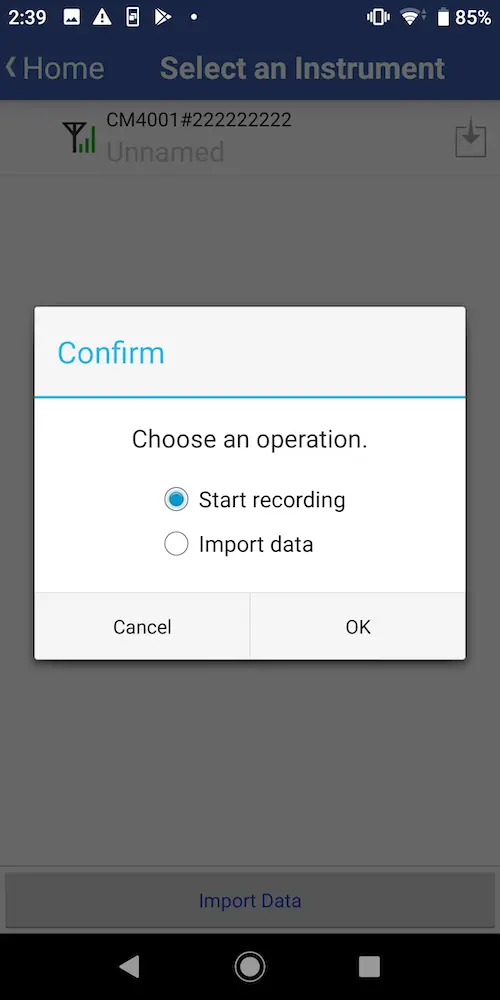
Select [Start recording] and tap [OK].
5
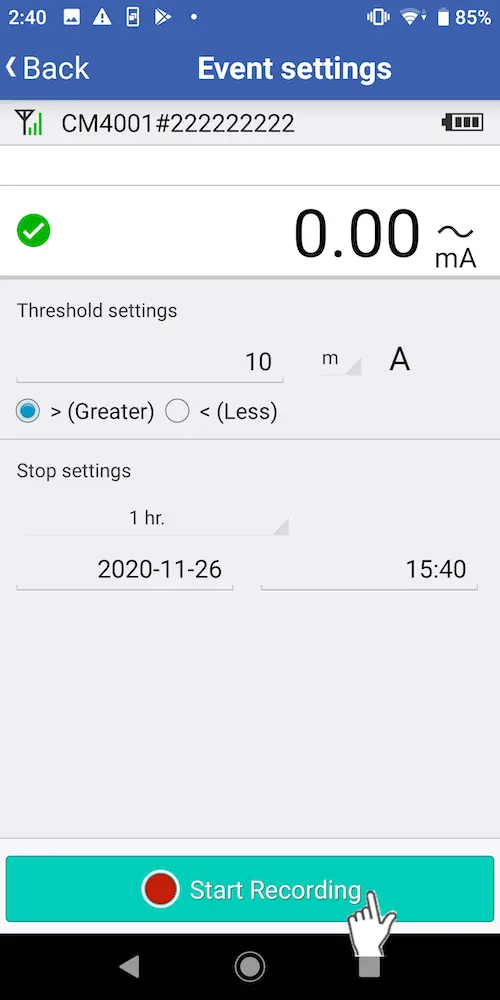
On the event settings screen, select the desired threshold, unit prefix, direction (“greater than” or “less than”), and stop time.
Some models can use only the “greater than” or “less than” setting. For more information, see “Models that support event recording and associated precautions” below.
6
Tap [Start Recording] to start recording.
7
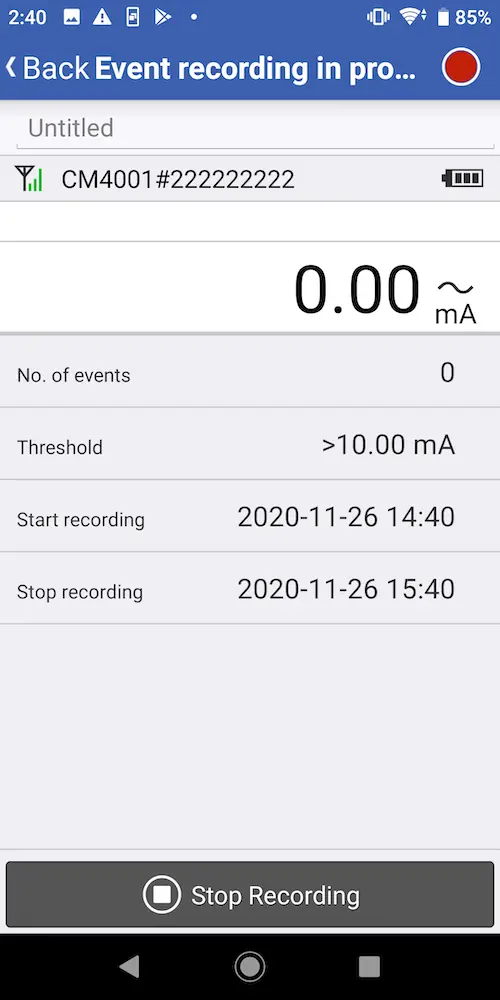
The [Recording Events] screen will be displayed.
Recording will stop automatically when the recording stop time is reached.You can also tap the [Stop Recording] button to stop recording.
8
Tap the [Back] button to return to the [Select Instrument] screen.
If you wish to start recording on other instruments as well, repeat the steps starting with Step 3 (instrument selection).
If you wish to exit the app, disconnect the instrument and exit the app.The instrument will continue measurement and stop at the configured stop time.
If you wish to exit the app, disconnect the instrument and exit the app.The instrument will continue measurement and stop at the configured stop time.
Want help or have questions?