

Save photos with measured values
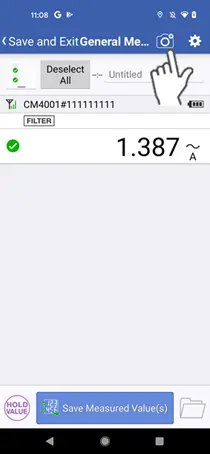
Using camera mode
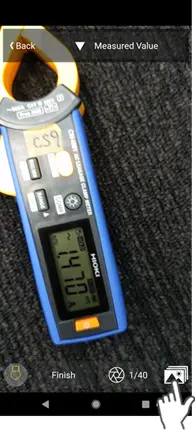
1
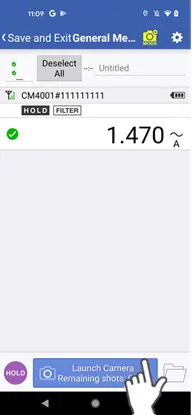
Tap the white camera icon at the top right of the measurement screen.
On the measurement screen (in camera mode), functionality is the same as on the normal measurement screen, except when automatic saving has been disabled on the instrument.
Holding values and canceling hold operation on the instrument remotely
1
Tap the [Hold] ([Cancel Hold]) button.
2
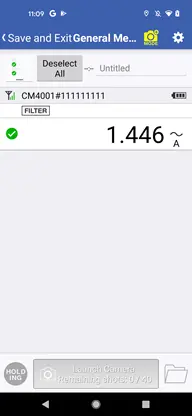
A “hold” (or “cancel hold”) command will be sent to instruments with green check marks, and the receiving instruments will hold their value (or cancel their hold state).
This function is not available for some instruments.

3
The button label will change to [Holding] while the “hold” command is being sent, and you will not be able to use the buttons on the screen.
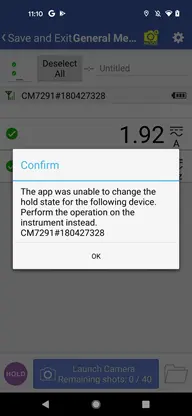
4
If any of the instruments with green check marks is unable to hold its value (or cancel its hold state), a cautionary message will be displayed.
To hold the value (or cancel the hold state) on that instrument, operate the instrument directly.
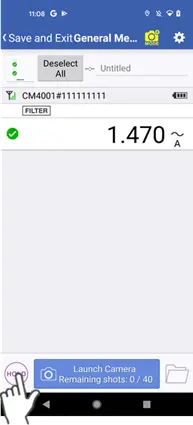
Launching the camera
If all instruments are in the hold state
1
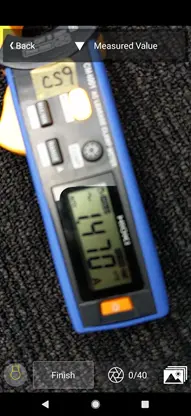
Tap the “launch camera” icon at the bottom of the measurement screen (camera mode).
Once all instruments with green check marks have held their values, measured values (with green check marks) will be saved, and the camera screen will be launched.
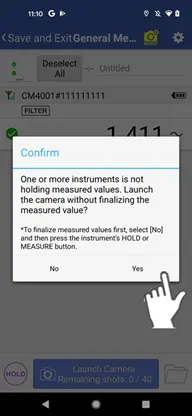
If any instrument is unable to hold its value
1
If any of the instruments with green check marks is unable to hold its value (or cancel its hold state), a cautionary message will be displayed.
2
Tap [Yes] to save the measured values that have been automatically acquired up to that point and launch the camera screen.
Since values are not being held, the saved measured values may differ from the measured values displayed by instruments.
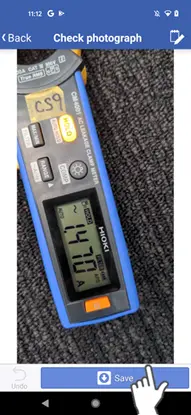
Taking and saving photographs
1
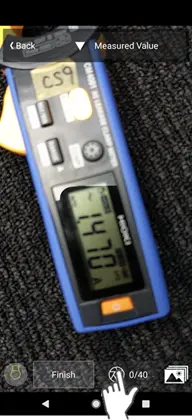
Once the camera screen has launched, you can take photographs using the [Take Photo] button at the bottom of the screen.
You can take up to 40 photographs before ending one standard measurement session.
2
Once you have checked the photographs you took for problems, you can save them using the [Save] button.

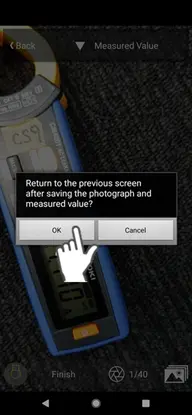
Saving measured values and photographs
1
Once you have finished taking photographs, tap the [Done] button.
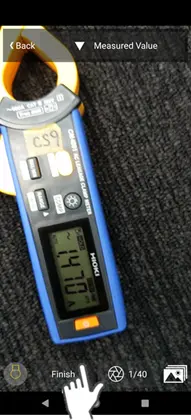
2
Tap [OK] to save the measured values and photographs.
Checking saved measured values and photographs
1
You can review a list of measured values that were saved when the camera screen was launched using the pull-down menu at the top of the camera screen.
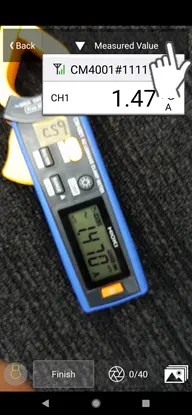
2
You can also tap the album icon at the bottom right of the screen to review saved measurements and photographs.

Going back without saving measured values or photographs
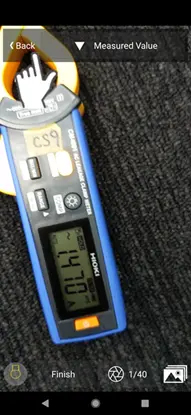
1
Tap the [Back] button at the top left of the screen.
2
Tap [Yes] to return to the measurement screen (camera mode) without saving the measured values or photographs.
Want help or have questions?